
I wouldn’t wonder what your favorite IDE is and by the way most of the software developers prefer Eclipse or Netbeans as their integrated development environment. I prefer using Eclipse since it does have its maturity itself and great community gathered around it. The point I want to explain here is how to attach JDK sources to your favorite eclipse editor. When you code, probably you might encounter this problem. It is mentioned below. You won’t be able to see the String class source code.
Yeah right. Cool, sometimes eclipse automatically detect the source code relates to JDK class libraries.IN case if not you will be experiencing this message “Source not found”. No worries, we have to get out of this in order to see the implementation of the JDK classes. Yeah we can handle it; it is not a rocket science J seeing the implementation of JDK library classes. Rationale is you have to attach the source file to eclipse IDE. Let’s do this. There is several ways to do this.
This method does the same thing where first method did. First you should navigate to the right location. Here is the direction. Right click on particular project then properties->Java->Build Path->Libraries. Then expand the JRE System Library, after that again expand the rt.jar click on the Source attachment. At last, you need to give location of source code.

Third Method
So far we have learned two methods to see the source of the JDK library classes. This is the last method that we are going to discuss. Personally I prefer this method rather than using previously mentioned methods. These are the steps. First go to Window->Preferences->Java->Installed JRE’s and click Edit. For your desired JRE, expand rt.jar and select Source attachment then click Source attachment.Simply, select source code file and press OK.
 In a conclusion, this is not a hard task to do. However, why I write this blog targeting the developer audience who will be diving deep to feel the inside of JDK class libraries. Still if you are not in a position to feel the inside of java. This article will provide a big help to get going further.
First Method
You can directly link source code by clicking the attach source button and giving the location where source code folder is. Normally, source code folder bundles in under JDK $HOME (e.g. C:\Program Files\Java\jdk1.6.0_14\src.zip)


Second Method
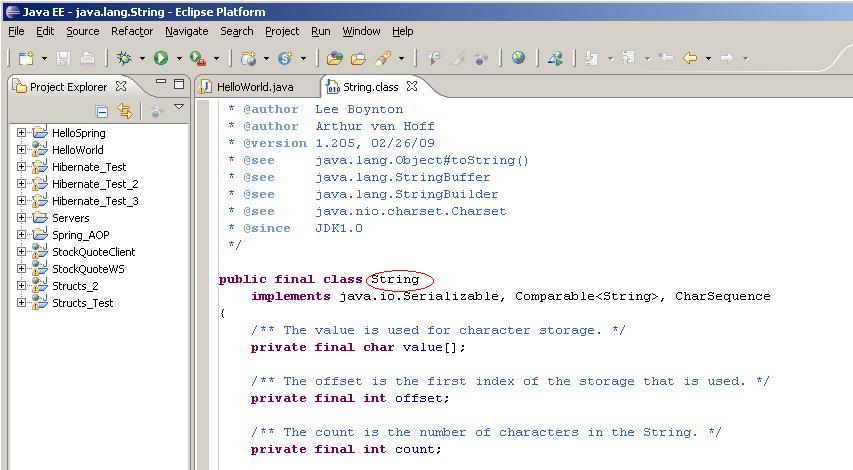
You could give the location by clicking external file and specify the source code location. Now it is fine. You are able to see the String class source code. It looks like a below figure.

This method does the same thing where first method did. First you should navigate to the right location. Here is the direction. Right click on particular project then properties->Java->Build Path->Libraries. Then expand the JRE System Library, after that again expand the rt.jar click on the Source attachment. At last, you need to give location of source code.

Third Method
So far we have learned two methods to see the source of the JDK library classes. This is the last method that we are going to discuss. Personally I prefer this method rather than using previously mentioned methods. These are the steps. First go to Window->Preferences->Java->Installed JRE’s and click Edit. For your desired JRE, expand rt.jar and select Source attachment then click Source attachment.Simply, select source code file and press OK.

© Nuwan Arambage-"transcending verge of life"
hey man, thanks for adding the screenshots for attaching source in Eclipse. I have also posted blog post on attaching source in Eclipse, do let me know how you find it.
ReplyDelete